
Connect QVeris MCP to ChatGPT: OAuth Setup Guide
Connect ChatGPT on the web to QVeris Hosted MCP with default OAuth. Choose account sign-in or authorize with an existing API key, then verify one tool call.
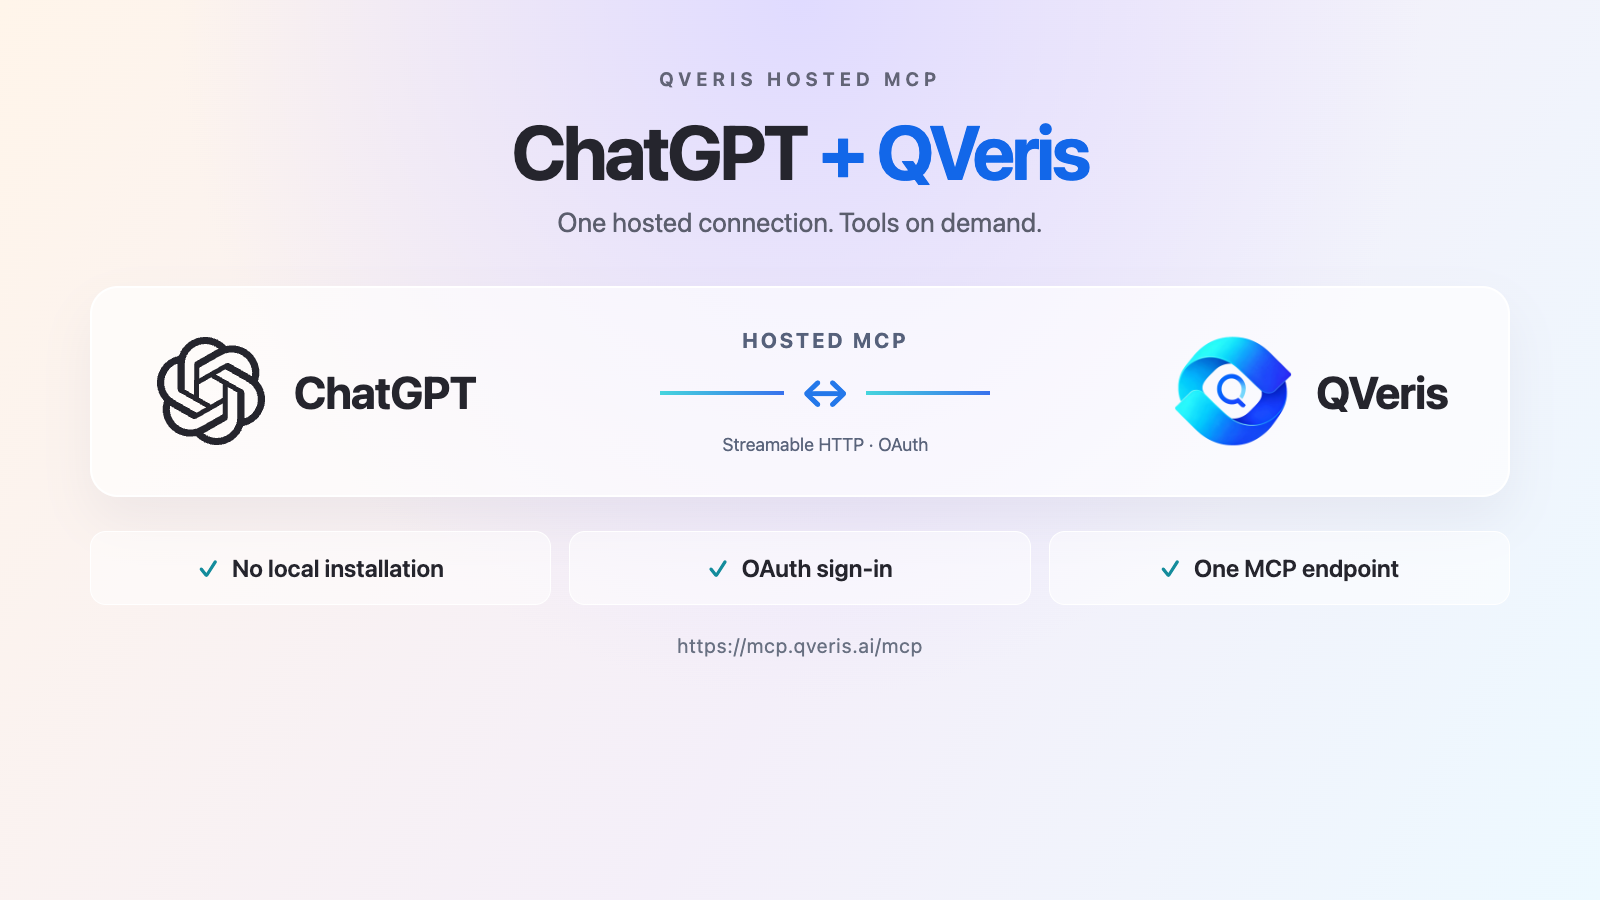
Use QVeris tools in ChatGPT through one hosted endpoint, without installing a local server. Follow the steps below in ChatGPT on the web; desktop apps require separate setup.
Last checked: . Menu labels and availability may vary with your account and workspace.
Before you start
You need access to custom MCP plugins in ChatGPT and either a QVeris account or an existing QVeris API key. Workspace permissions and security restrictions can prevent creation or use. If the add option is missing, ask your workspace administrator and check the official ChatGPT instructions; do not assume the QVeris endpoint is broken.
- Server URL:
https://mcp.qveris.ai/mcp, including the final/mcp. - Transport: Streamable HTTP. ChatGPT web may not show a separate transport selector.
- Authentication: OAuth. Leave Advanced closed and do not enter a client ID or client secret for the recommended path.
- Keep the same ChatGPT account and workspace throughout creation, authorization and use.
Connect with default OAuth
- Open ChatGPT Plugins, select the plus button and choose Add custom MCP server. Labels can vary by account and rollout.
- Name the connection QVeris. Under Connection, paste
https://mcp.qveris.ai/mcpinto Server URL. If a transport option appears, use Streamable HTTP. - Select OAuth and keep Advanced closed. Leave client ID and client secret empty. The default flow handles client registration for you.
- Read the risk warning, select the acknowledgment if you accept it, then choose Create as a plugin. Continue to authentication when prompted.
- On the official QVeris authorization page at
https://auth.qveris.ai, choose Use account or Use API Key. Follow the matching instructions below, review access and select Allow and continue. - Let the callback return to ChatGPT in the same account and workspace. Review the resulting plugin and tools, install it if prompted, then open a new chat. Type
@and select QVeris before testing.
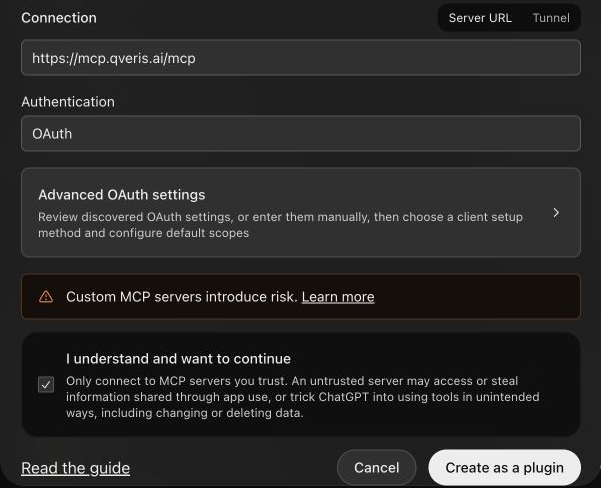
Choose account or API Key authorization
Option A: Use account
Choose Use account on the QVeris page. Sign in to the QVeris account whose access you want ChatGPT to use, review the permissions, then select Allow and continue. Your QVeris sign-in happens on QVeris; do not type a password into the chat.
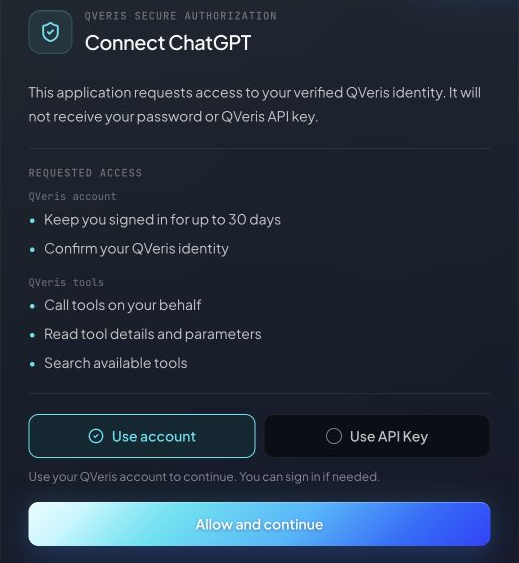
Option B: Use API Key
Choose Use API Key on the same official QVeris authorization page. Enter an existing QVeris key in that page’s key field and complete validation. Review access and select Allow and continue, then return to ChatGPT. Never paste the key into a chat, the MCP URL, a screenshot or a support message.
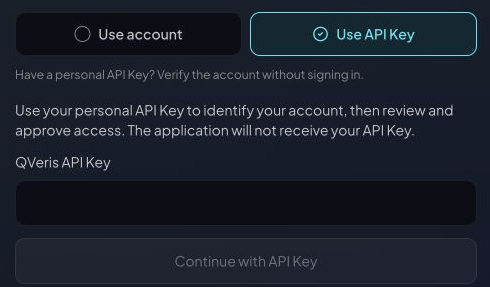
This still uses OAuth. The API key verifies access on QVeris’s authorization page; ChatGPT completes the OAuth connection. It is different from manually setting an Authorization: Bearer … header in another MCP client. Do not add a bearer header to this ChatGPT setup.
Consent covers identity, continued authorization and tool discovery, inspection and execution. Review the actual screen before approving. A successful link does not grant every provider entitlement or guarantee that a paid tool is free.
Verify Discover → Probe → one Call
Select this QVeris plugin in a new chat so another connection or built-in browsing cannot be mistaken for it. A connected label or a fluent answer alone does not prove execution. Start with discovery and inspection; authorize a single read-only call only after you understand the expected cost.
- Discover: Ask: “Use only the QVeris plugin selected in this chat to discover a current-weather tool for London. Do not execute the data lookup yet.” Confirm a real tool discovery result.
- Probe: Ask: “Probe or inspect the discovered tool. Show its required parameters, read-only behavior, provider and expected credit cost. Do not call it yet.” Use the actual returned tool schema; do not invent tool IDs or assume an inspection is a completed data call.
- Call: If the proposed inputs and cost are acceptable, approve exactly one read-only lookup. For example: “I approve one call to the inspected London weather tool at the displayed cost. Do not repeat the call automatically.” If the cost is unknown or exceeds your limit, stop and clarify before approval.
- Check evidence: Expand the tool details and check the execution status, source, observation time and returned data. Review usage or credit settlement in QVeris. If the result is uncertain, inspect its status before retrying to avoid a duplicate charge.
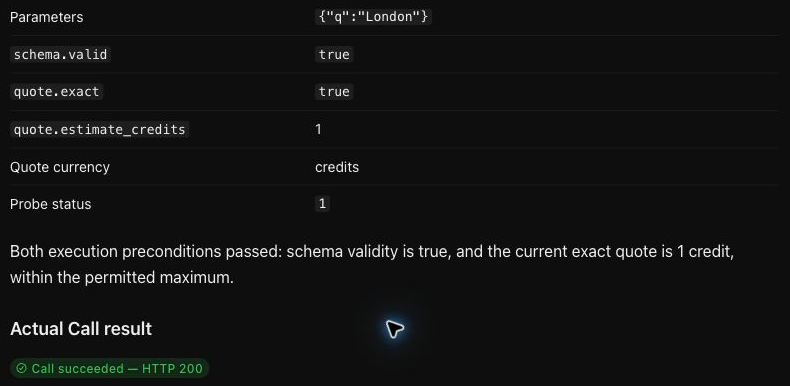
Weather is just a small example. For financial research, you can instead discover a quote tool for AAPL, inspect its inputs and cost, approve one call, and check the source, currency, quote time and delay status. Availability, freshness and charges depend on the provider and your account.
What to expect from automatic renewal
OAuth allows ChatGPT to renew access using a refresh token while the authorization remains valid. You should not need to paste a new token into the conversation when a short-lived access token expires. Revoked access, policy changes or an expired authorization can still require sign-in again.
Automatic renewal does not mean the connection will remain active indefinitely. If you see an expired-session or authorization error, reconnect instead of repeatedly running the tool.
If ChatGPT asks to reconnect, use the existing connection’s reconnect or authentication action and finish QVeris authorization in the same account and workspace. You do not need to manage tokens manually.
Troubleshoot connection and callback failures
- No add option: Check workspace permissions and current official instructions. A missing menu is not proof of an MCP transport failure.
- Approval returns “We couldn’t connect” or a loading error: Check that you stayed in the same ChatGPT account and workspace and used the exact server URL. If the page offers a normal Continue or retry action, complete it. Then try reconnecting the existing connection. An intermittent callback, Cloudflare or page-loading error may clear on a later attempt; if it continues, use the support steps below.
- Still failing: Try once in a private browser window, signing in to the same ChatGPT account and workspace. Recreating a connection is an optional later troubleshooting step, not required setup or a proven fix; record the error before changing it.
- HTTP 400
OAUTH_OWNER_PROFILE_ID_MISSING: This error can appear when returning to ChatGPT after approval. It does not identify a single confirmed cause. Reconnect in the same account and workspace; if it persists, report the error to support. - API Key rejected: Validate the existing key on the official QVeris authorization page and check its status in your account. Do not put it in ChatGPT’s prompt, URL or headers as a workaround.
- Connected but no data: Install and select the intended plugin, review enabled tools, then run Discover and Probe. Inspect permissions, provider availability and usage limits before authorizing a Call. A connection does not guarantee a tool exists or has current data.
For persistent failures, contact QVeris support with only the UTC failure time, error response code and correlation/request ID if displayed. Do not send HAR files, cookies, API keys, access/refresh tokens, authorization codes, passwords or secret-bearing callback URLs.
Optional: CIMD and DCR in Advanced
CIMD means Client ID Metadata Document; DCR means Dynamic Client Registration. These are OAuth client-registration choices, separate from choosing Use account or Use API Key on QVeris. The default path is sufficient for a first connection.
For a normal connection, leave Advanced closed. If you need to select a registration method, open Advanced and choose CIMD or DCR when offered, then complete the same QVeris authorization flow. Default OAuth currently uses CIMD automatically.
You do not need DCR to connect. Changing the registration method does not guarantee a fix for a callback error; start with the reconnect steps in Troubleshooting.
Common questions
Do I have to choose DCR?
No. Select OAuth and leave Advanced closed. Client registration is automatic; DCR is an optional method when offered.
Is Use API Key the same as a bearer header?
No. In this flow you validate an existing key on QVeris’s official authorization page and complete OAuth. You do not send the key through the chat or configure a ChatGPT bearer header.
Does the web connection automatically work on desktop?
Do not assume that. This guide covers ChatGPT web. Follow the relevant client’s setup instructions for a desktop connection.
Is discovery enough to prove the connection works?
It proves discovery only. Inspect a tool, confirm its cost and authorize one read-only Call, then check the actual result and usage record.
Will I need to authorize every day?
Usually not. OAuth can renew access automatically while your authorization remains valid. If it expires or is revoked, ChatGPT may ask you to reconnect.
For endpoint and other client options, see QVeris Hosted MCP. For server selection rather than setup, see MCP servers for ChatGPT.