
Connect QVeris MCP to Claude: Custom Connector Setup Guide
A step-by-step guide to adding a custom connector, authorizing your account, and using QVeris tools in Claude.
Before you start
Connect Claude to QVeris Hosted MCP using a custom connector. Follow four main steps: add the connector, configure authentication, authorize your account, review permissions, and enable QVeris in a conversation. No local server or JSON configuration file is required.
Have your Claude account and a QVeris account or existing API key ready. In an organization, confirm that your workspace allows custom connectors. Menus and availability may vary by account and product version.
Use the server URL https://mcp.qveris.ai/mcp, including the final /mcp. Use OAuth authentication and Streamable HTTP.
1. Add QVeris as a custom connector
In Claude, open Customize → Connectors → Yours. Select Add → Add custom connector.
In the dialog, enter QVeris as the name and https://mcp.qveris.ai/mcp as the server URL. Keep the final /mcp and select Continue.
https://mcp.qveris.ai/mcp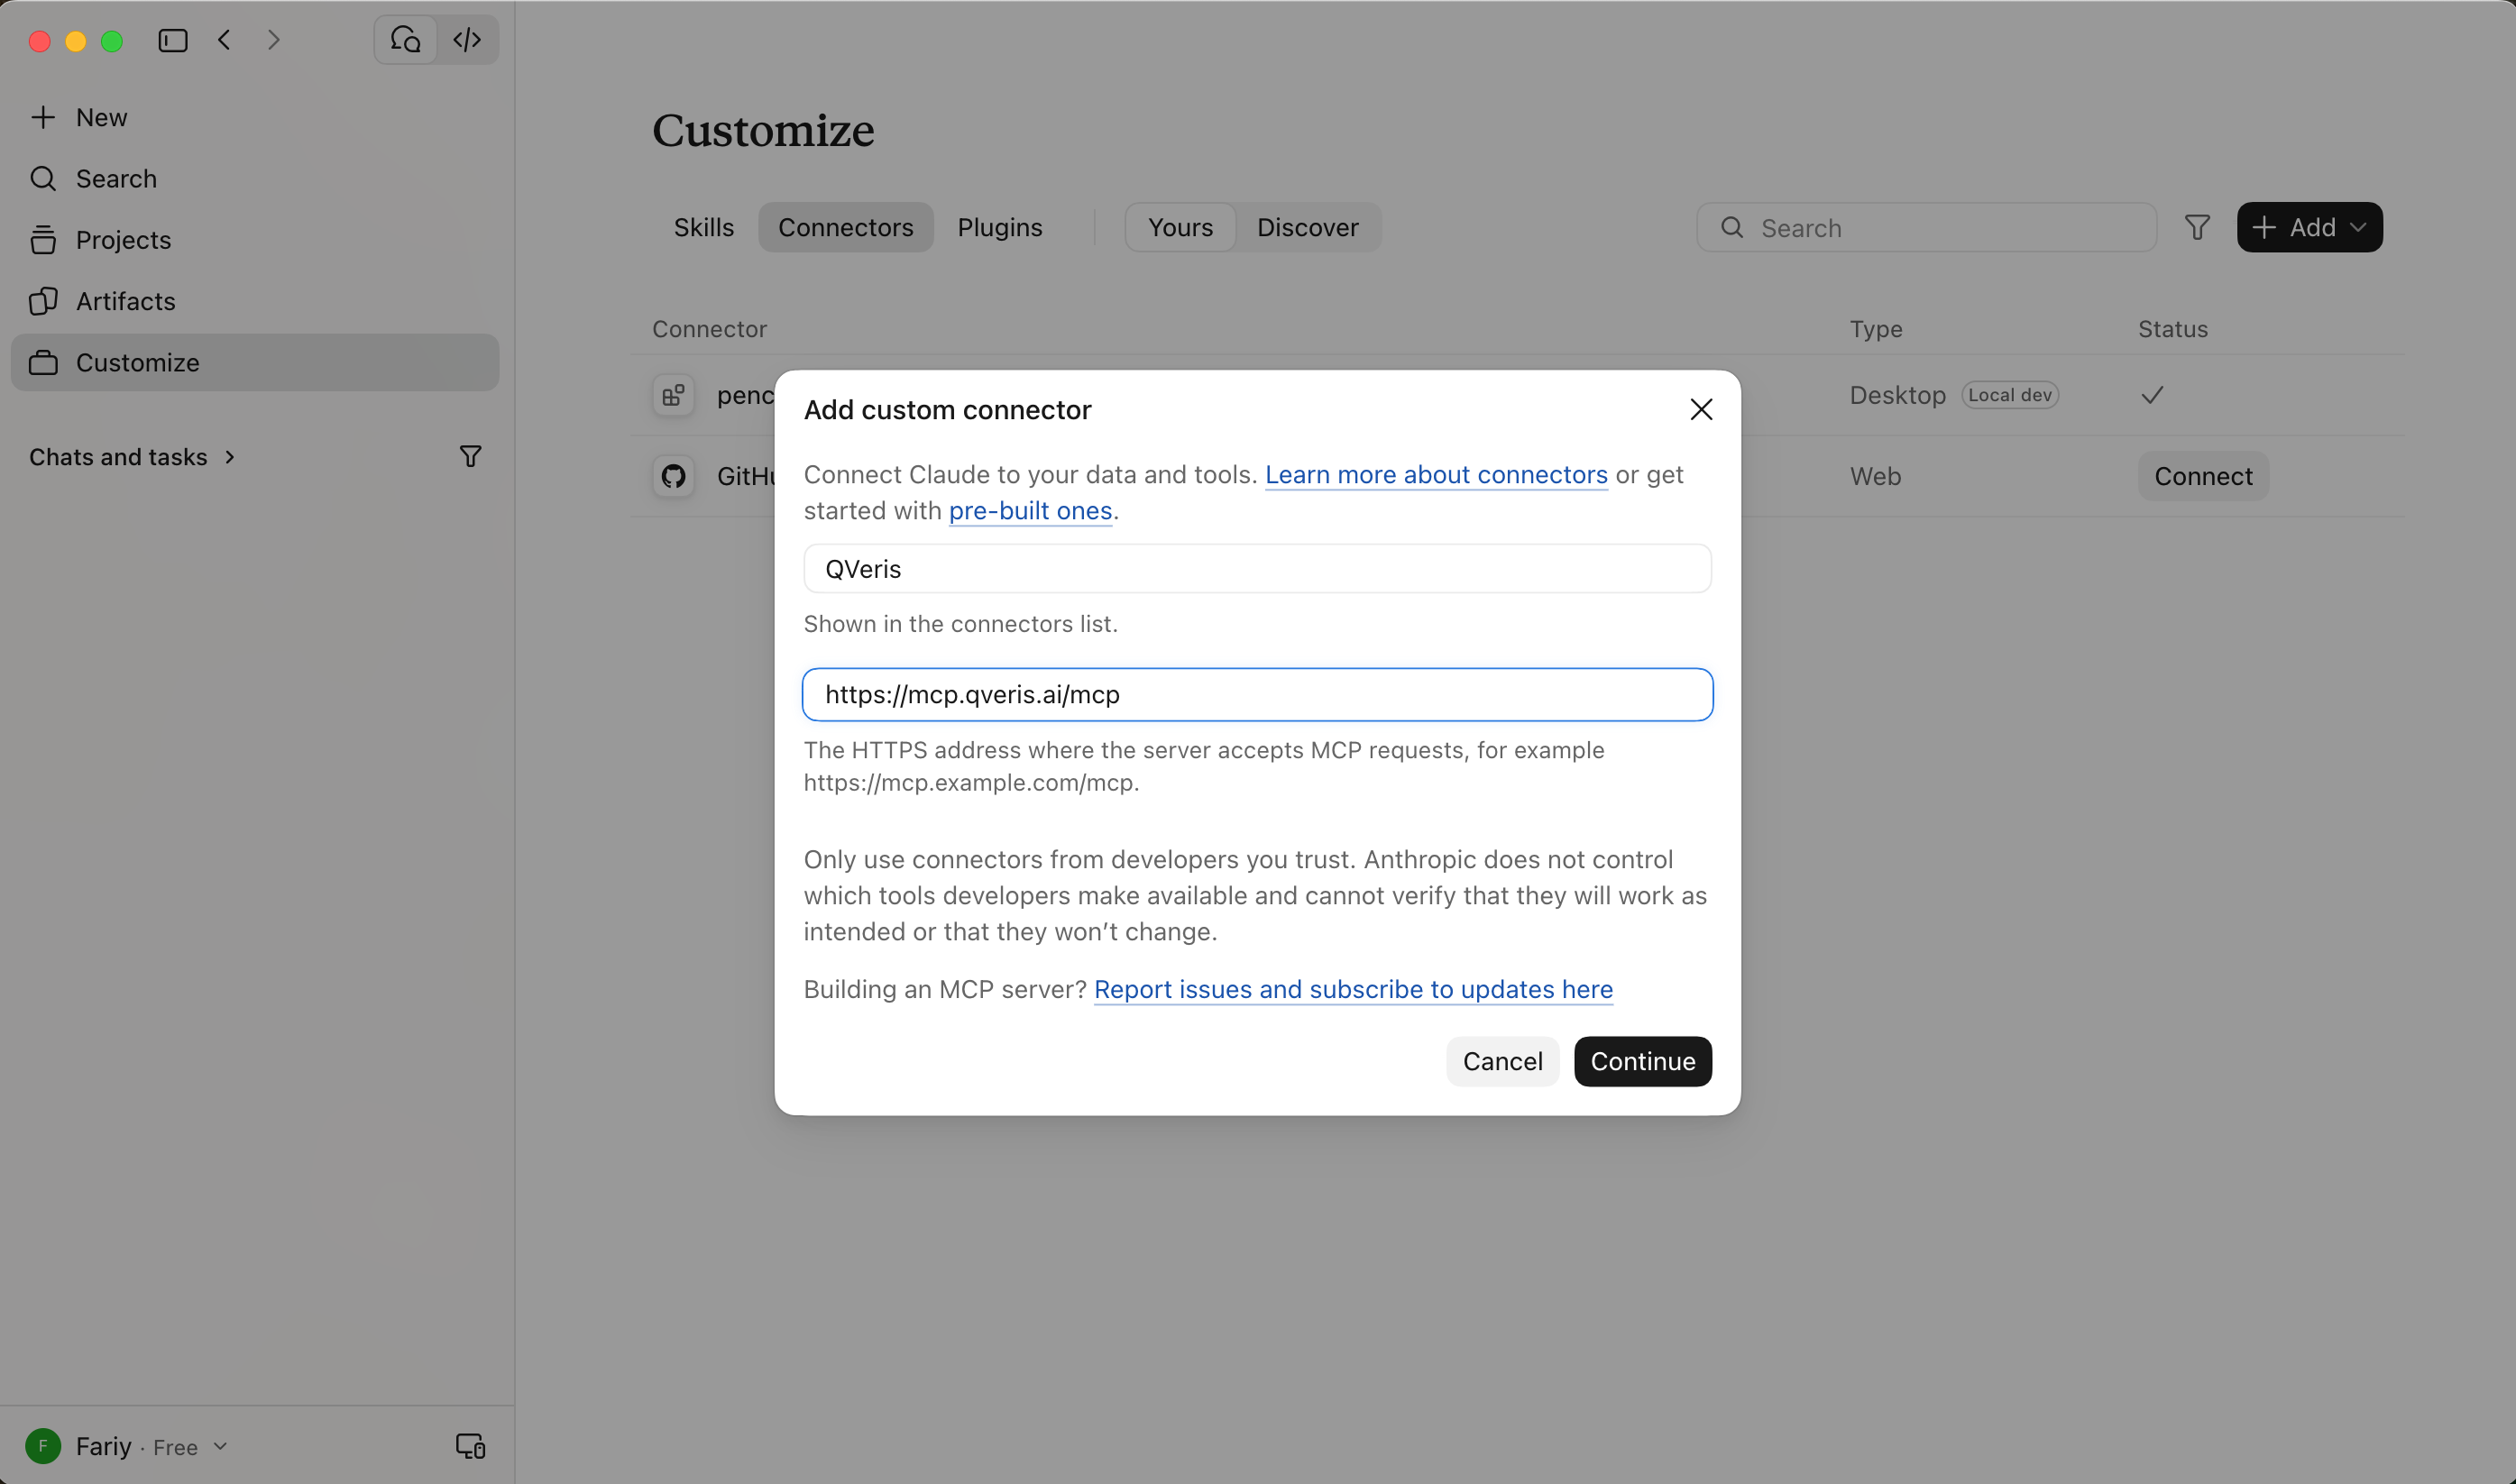
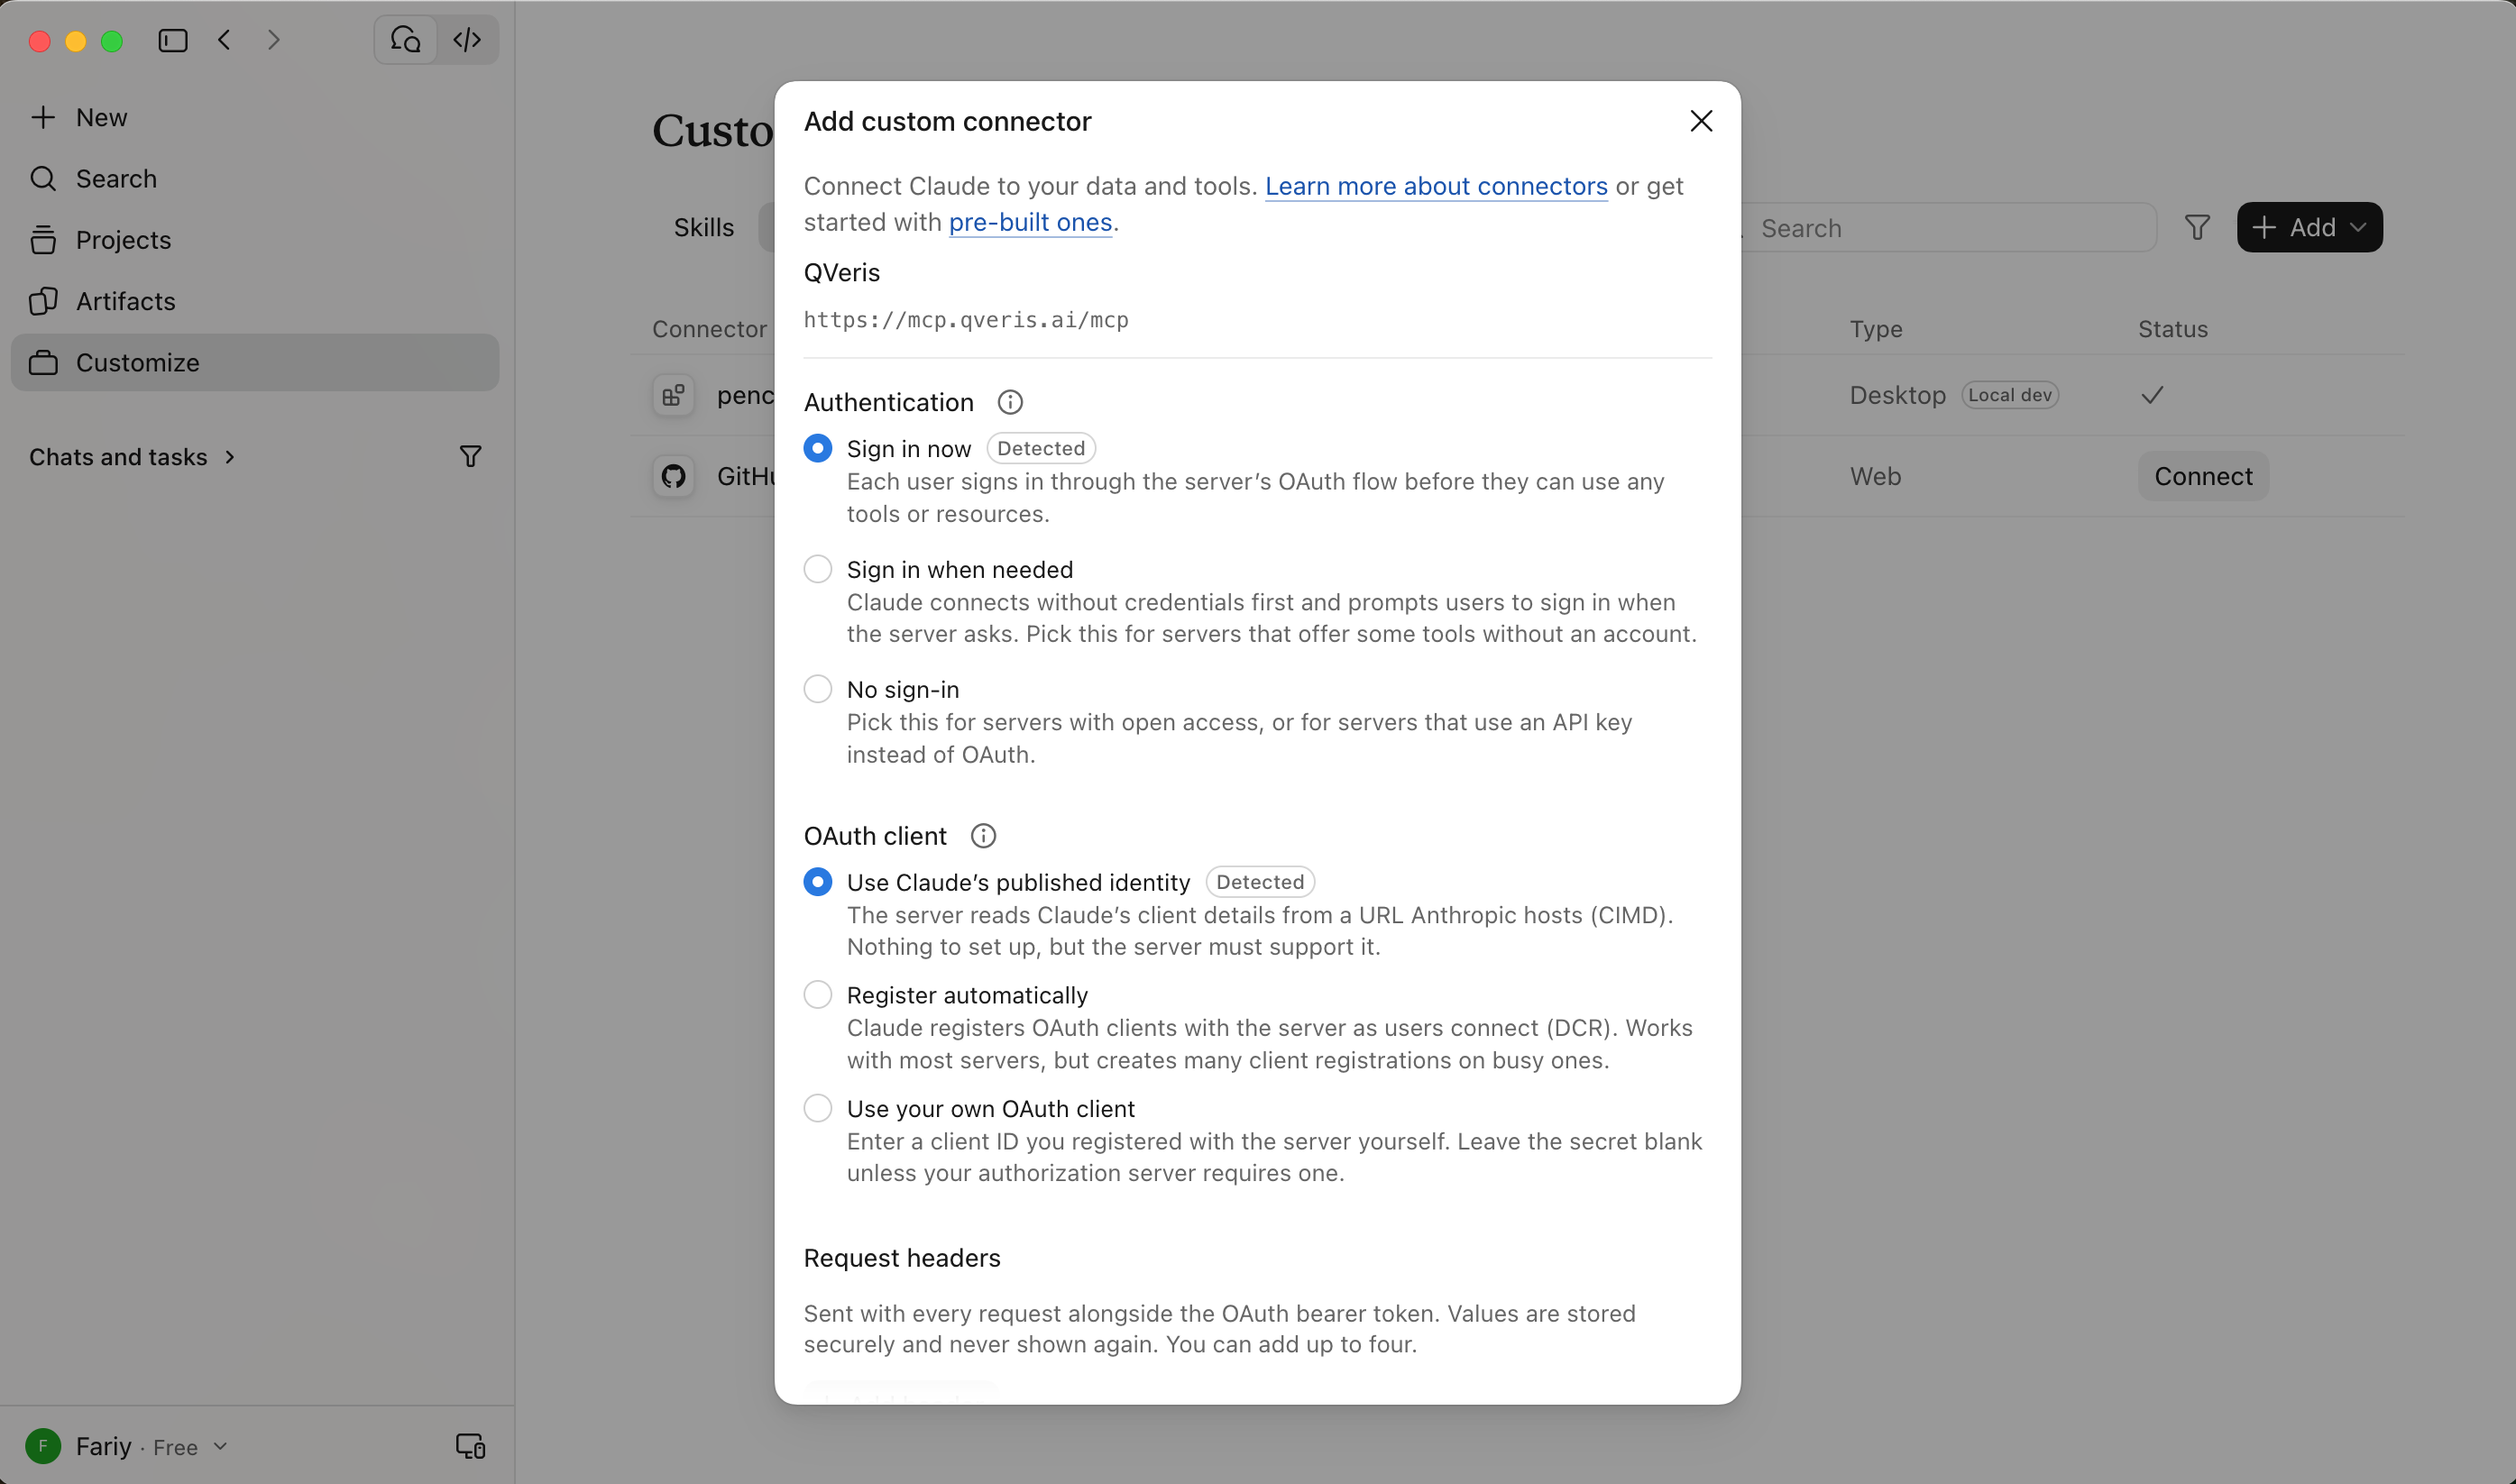
Under Authentication, choose Sign in now. Under OAuth client, keep Use Claude’s published identity. No client ID or client secret is required.
Leave Request headers empty. Under Advanced → Transport, keep Streamable HTTP, then select Add. If Claude shows a disconnected page, select Connect to open QVeris authorization.
2. Authorize with an account or API key
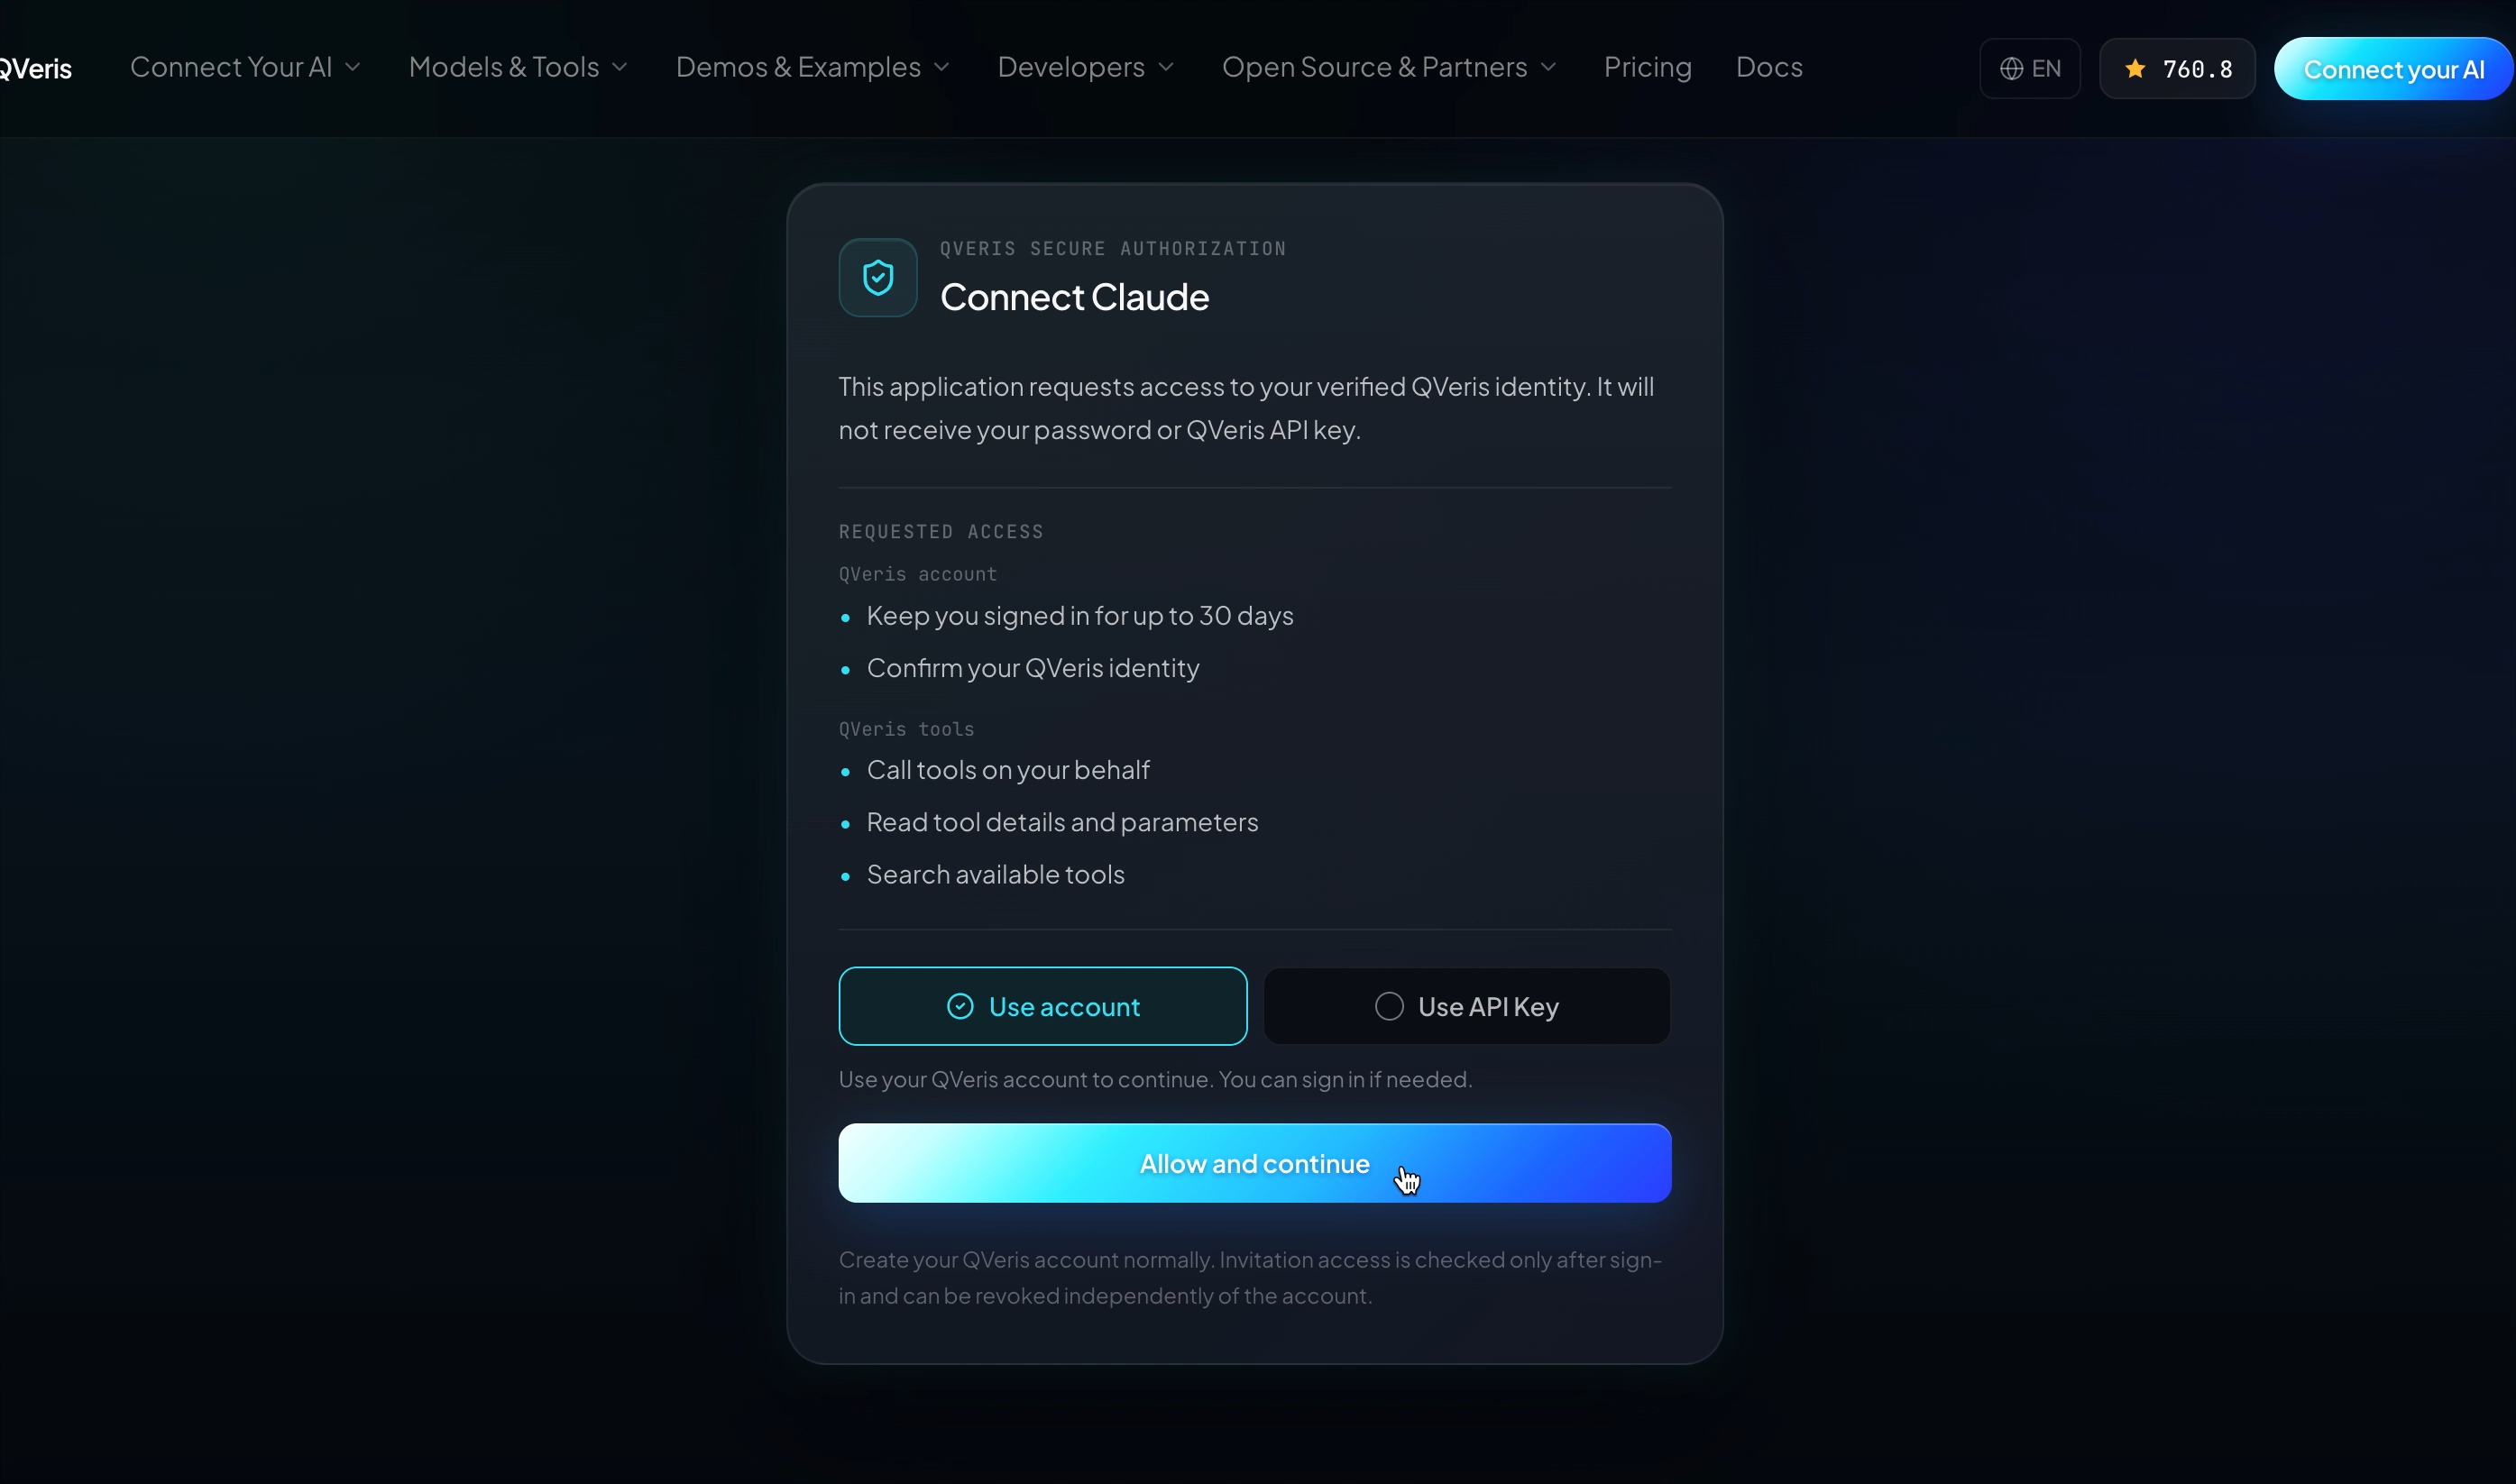
On the QVeris authorization page, confirm the application is Connect Claude. Choose either of the following methods to verify your identity, review permissions, and complete authorization.
Method A: Use account
Select Use account and sign in to the QVeris account whose access you want Claude to use. Review the requested permissions, then select Allow and continue. Complete sign-in on QVeris rather than entering your password in the conversation.
Method B: Use API Key
On the same official QVeris authorization page, select Use API Key. Enter your existing QVeris key in the QVeris API Key field, then select Continue with API Key to verify it.
After verification, review the requested permissions and select Allow and continue to return to Claude. Keep the key out of conversations, the MCP URL, and support messages.
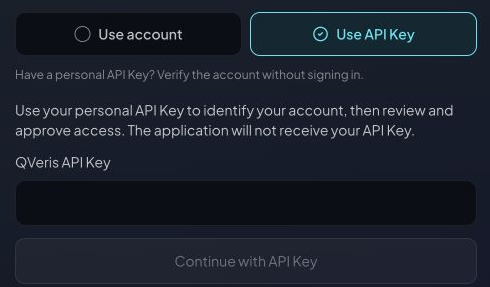
This method still uses OAuth. The key verifies access on QVeris; Claude completes an OAuth connection and does not receive your API key. Leave Request headers empty: this flow does not require an Authorization: Bearer header.
3. Confirm connection and review permissions
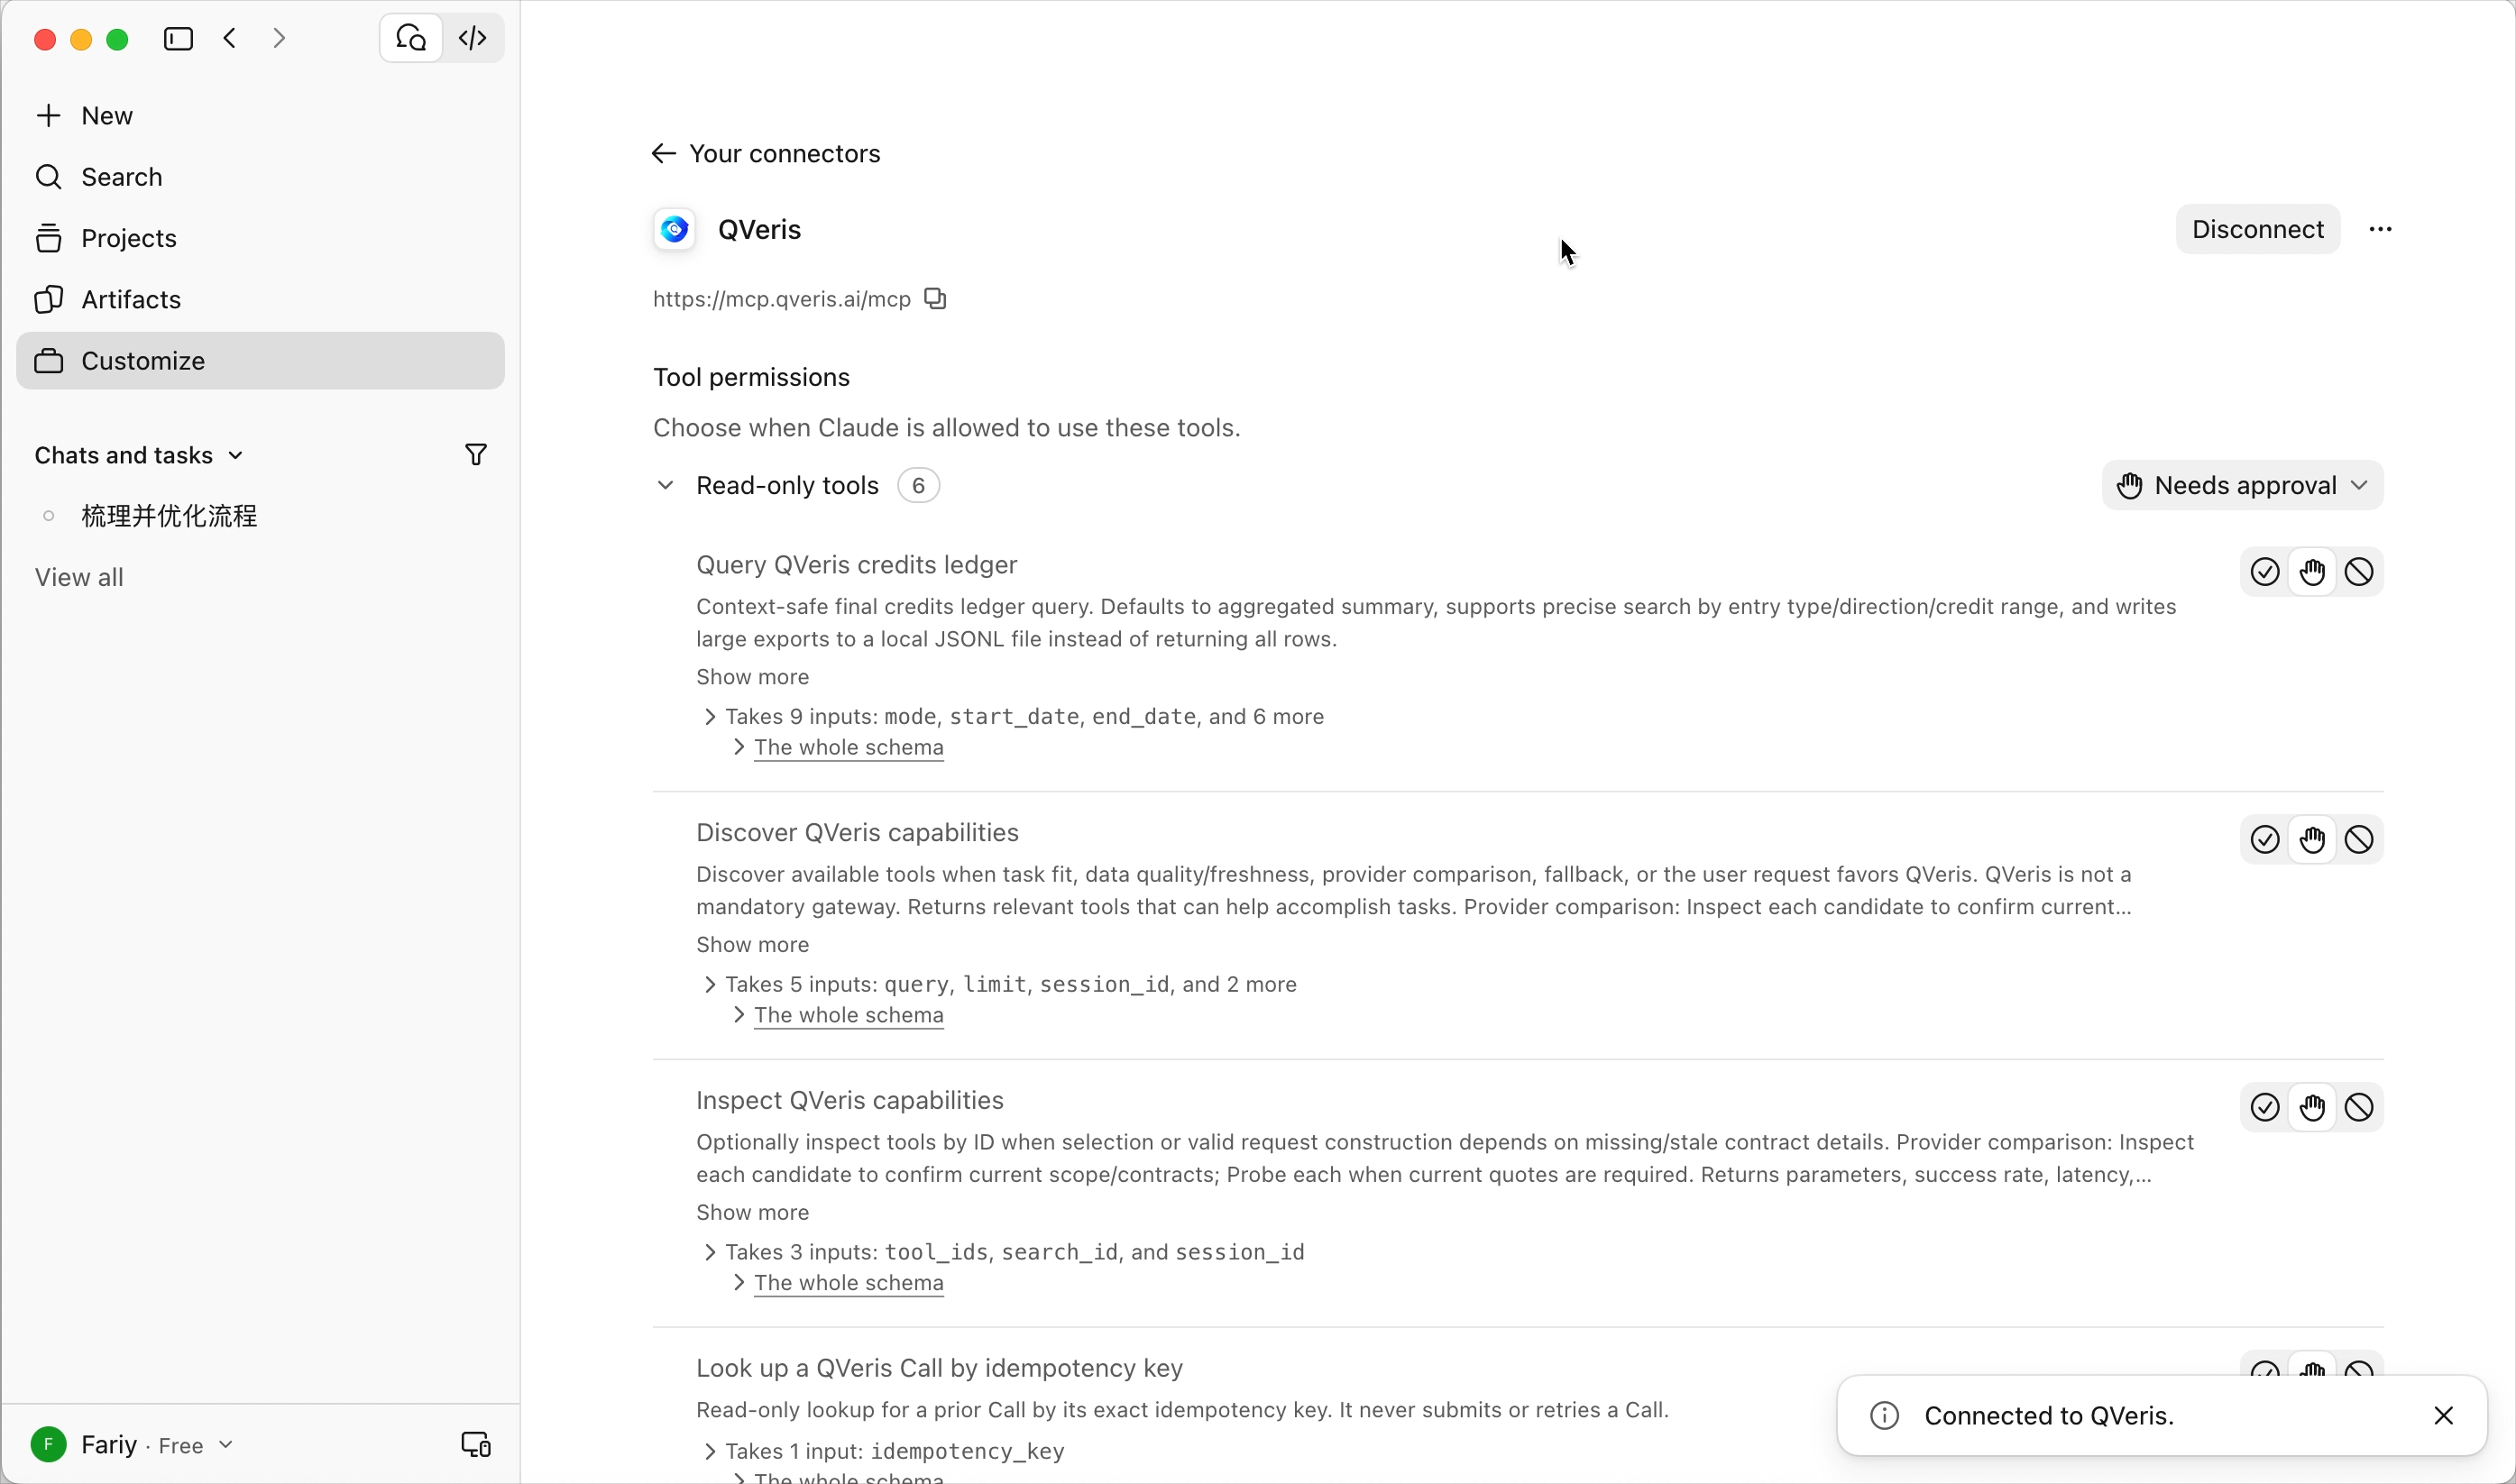
Back in Claude, confirm the “Connected to QVeris.” notification, the Disconnect button, and the Tool permissions list. If the page still shows Connect, finish authorization before proceeding.
Review the available tools and their permissions. With Needs approval selected for the read-only tools group, Claude requests approval when using the relevant tools. A connected account does not make paid tools free or grant every provider’s data permissions.
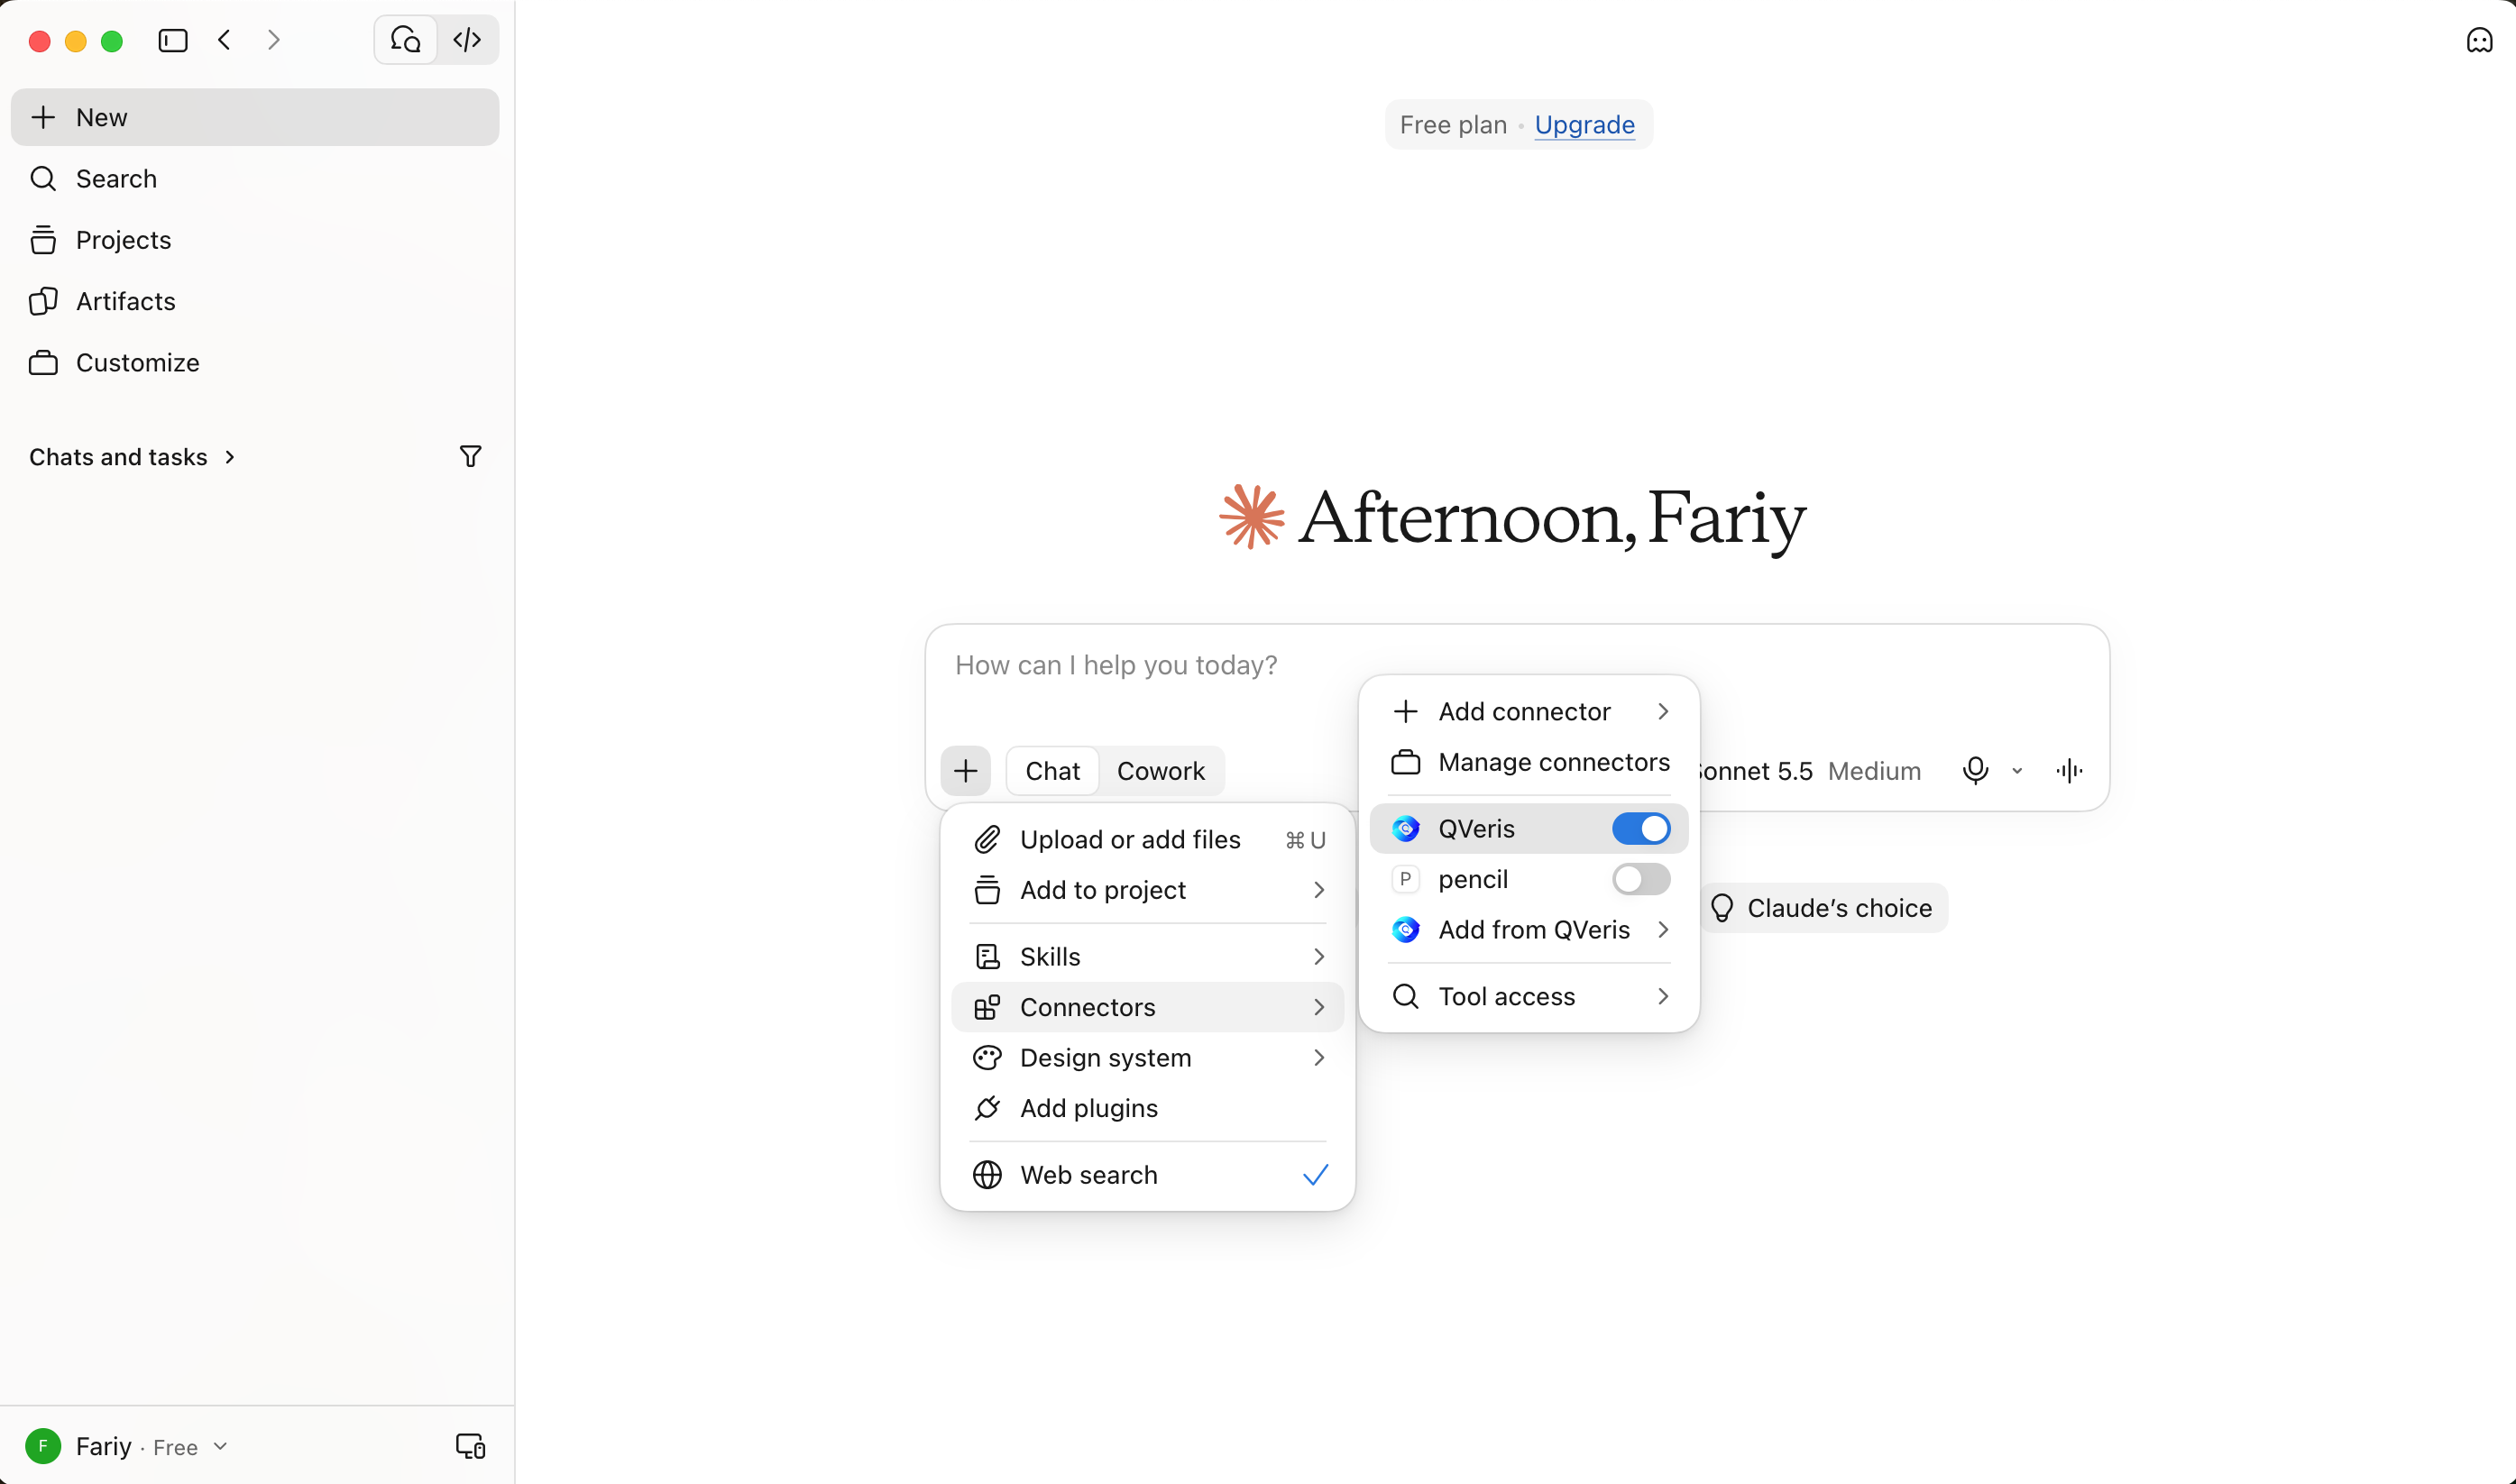
4. Enable QVeris in a conversation
Start a new conversation, select + beside the composer, and open Connectors. Turn on QVeris; the blue switch indicates it is enabled for this conversation.
Describe the data or task you need, including the time range and output format. To check the MCP connection, explicitly ask Claude to use QVeris and inspect the tool activity as described below.
Verify QVeris: Discover → Inspect → Call
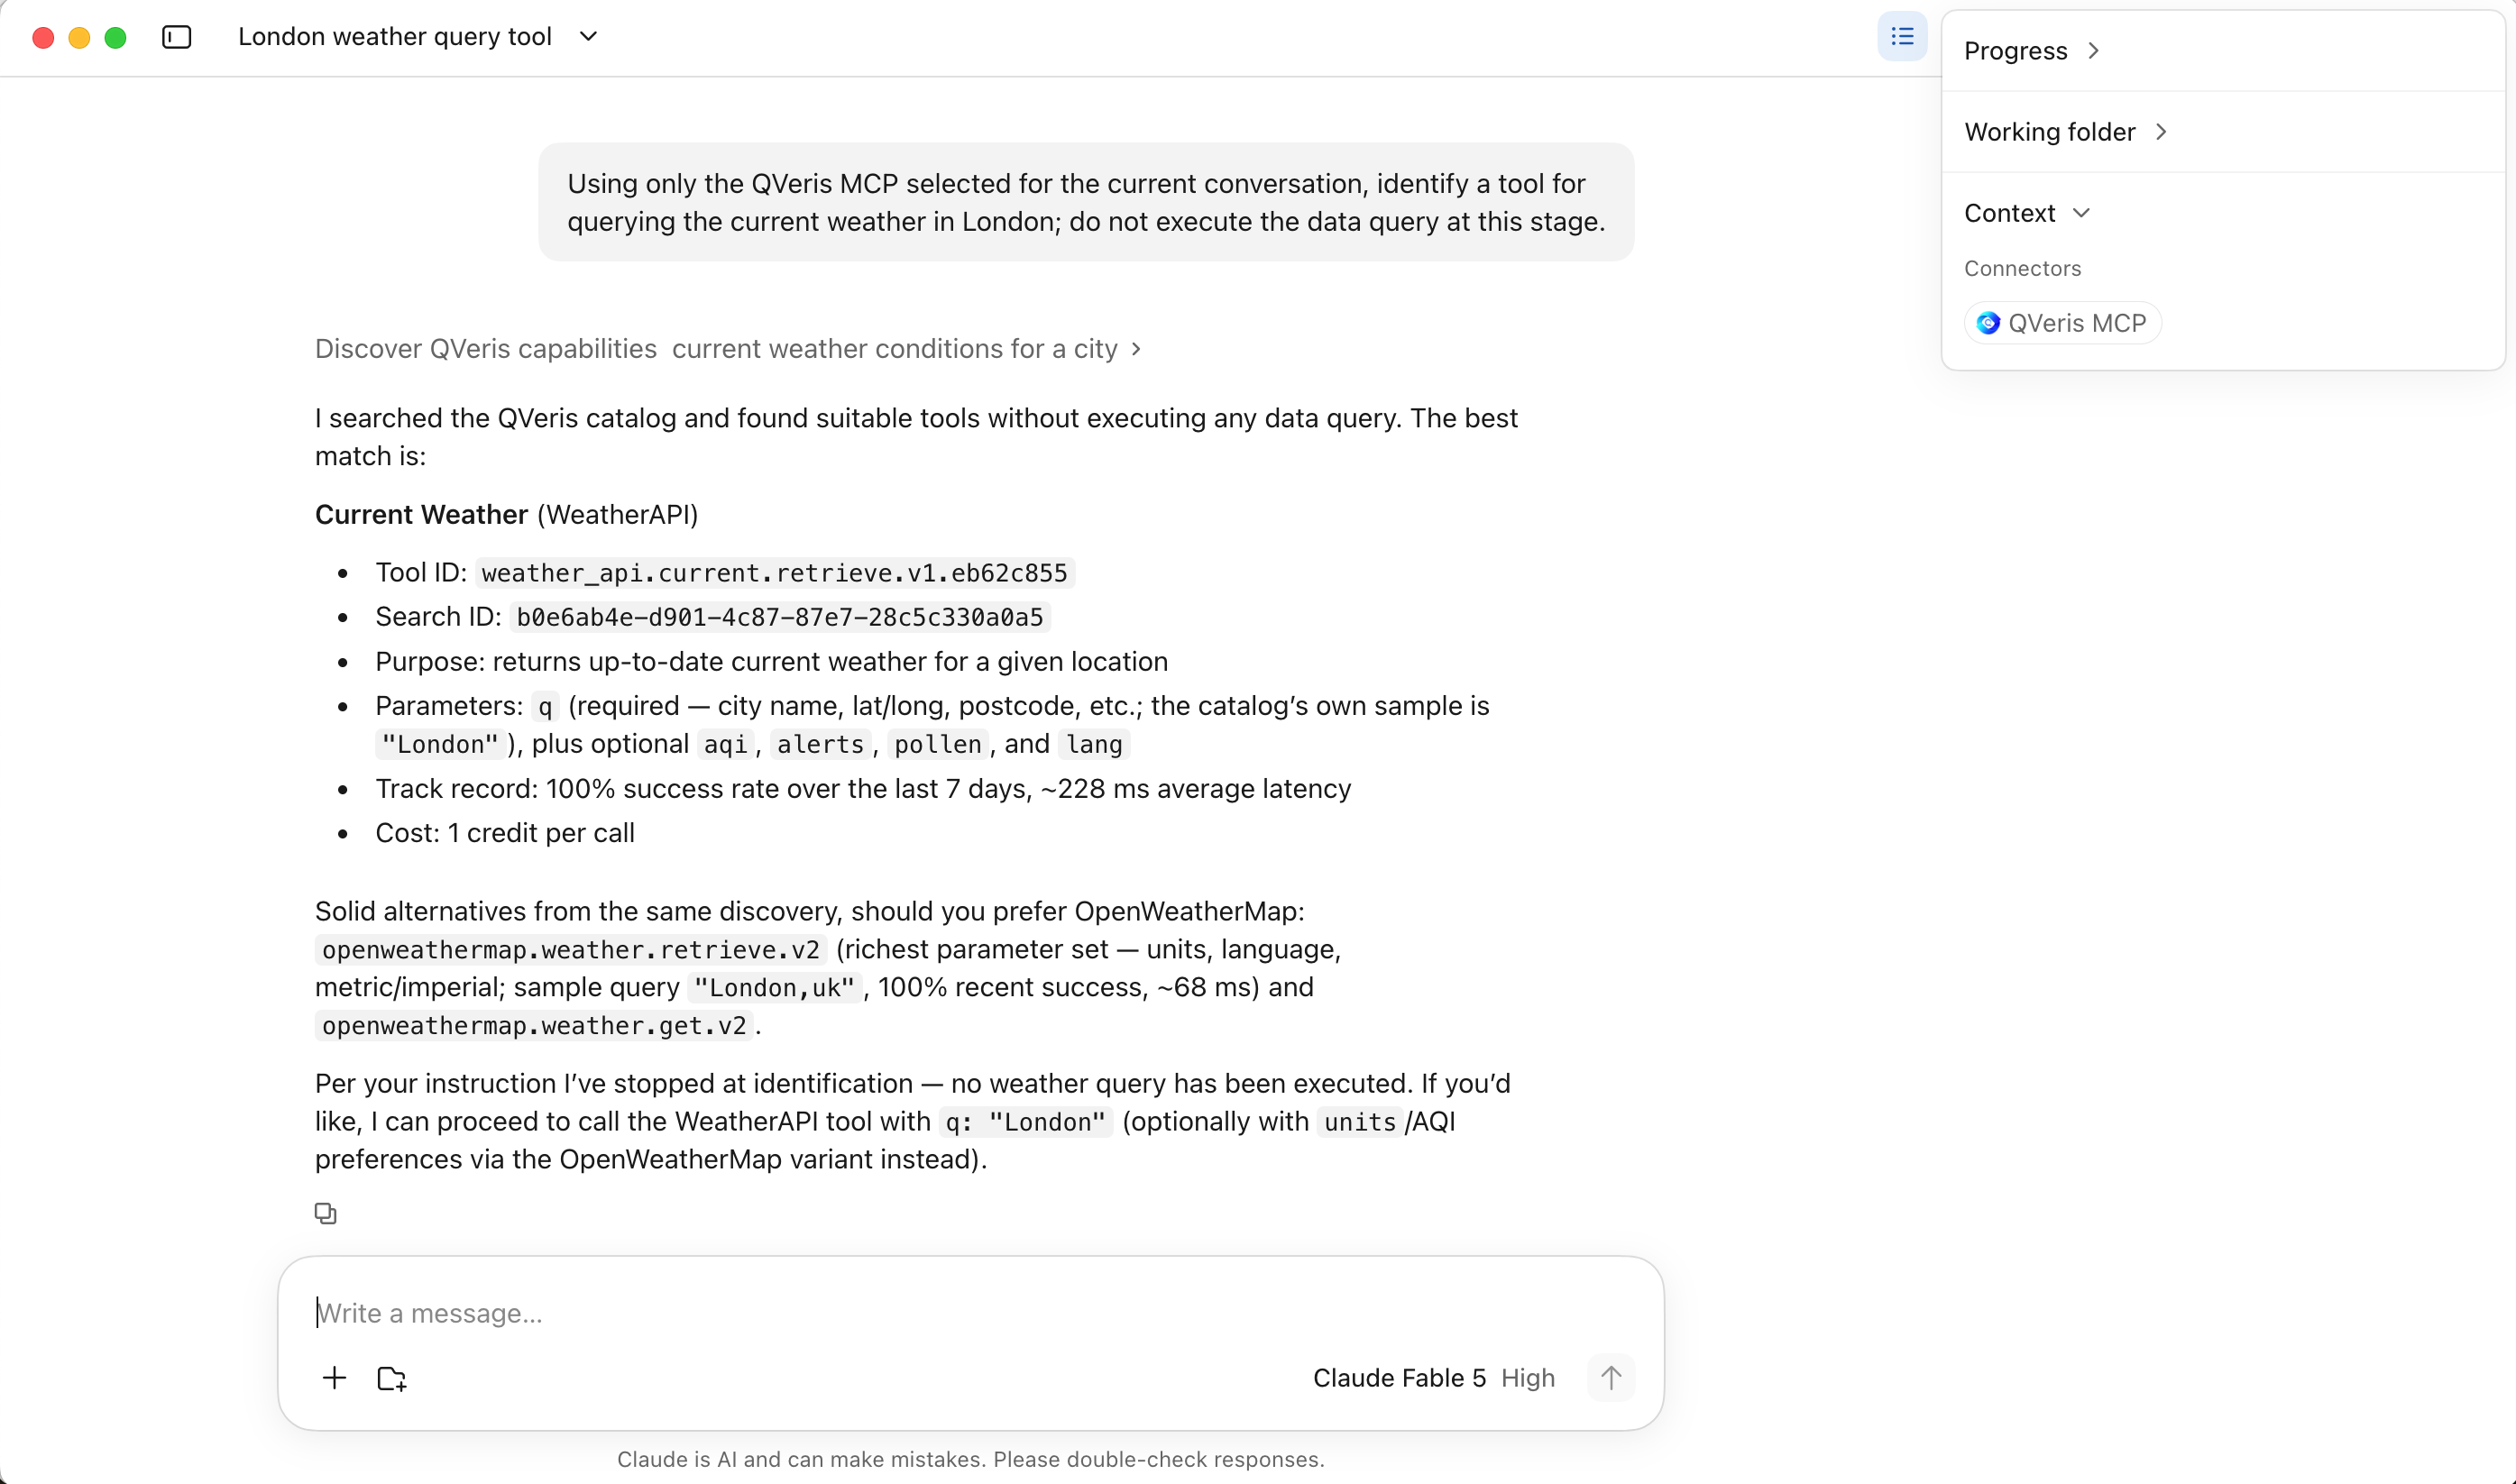
After enabling QVeris, first verify tool discovery. Use the QVeris MCP selected for the current conversation and submit this request:
Using only the QVeris MCP selected for the current conversation, identify a tool for querying the current weather in London; do not execute the data query at this stage.
In this example, Claude invokes Discover QVeris capabilities and returns Current Weather (WeatherAPI), including the tool identifier, required q parameter, and a displayed cost of 1 credit per call. The Context panel also shows QVeris MCP. These details demonstrate a discovery call; the response explicitly states that no weather query has been executed.
Next, inspect the discovered tool: “Check or Probe this tool and show its required inputs, provider, read-only behavior, and current credit quote. Do not run the query yet.” Use the actual returned tool identifier and input schema. The example cost is not a fixed price; use the current quote.
Once the inputs and quote are acceptable, approve one call: “I approve one read-only London weather query using the inspected tool at the displayed cost. Do not automatically repeat it.”
Finally, open the tool activity and verify execution status, source, observation time, and returned weather data. Check QVeris usage if needed. Tool discovery confirms Discover only; verify Probe and the weather Call separately.
Troubleshoot connection and callback failures
Check where the flow stopped: adding the connector, authorizing on QVeris, returning to Claude, or running a tool. An error at one stage does not establish the cause of a failure at another.
No custom connector entry
Check Customize → Connectors and your account or organization permissions. In an organization, ask the administrator whether custom connectors are available to you. A missing entry does not indicate a QVeris endpoint failure.
Authorization completes but Claude does not connect
Confirm the server URL is https://mcp.qveris.ai/mcp and that you completed Allow and continue. Return to the original Claude account and workspace and check the connector status. If the browser asks to open Claude, complete that handoff. If Connect is still shown, use the existing connector to authenticate again.
Callback or authorization page fails to load
Record the error code and the stage where it occurred. Complete any Continue or retry action offered by the page, then try reconnecting the existing connector. If it persists, try the authorization flow once in a private browser window using the same account and workspace. These are diagnostic steps, not guaranteed fixes. Do not repeatedly recreate connectors or change OAuth client settings without evidence.
API key verification fails
Check the key’s status in your QVeris account and enter it in the official authorization form without extra spaces. Complete Continue with API Key, then review permissions and select Allow and continue. Do not move the key into the MCP URL, chat, or request headers to bypass verification.
Connected, but tools or data are unavailable
Check that QVeris is enabled in the current conversation and that the required tool is permitted. Run Discover, then inspect the tool inputs and quote before approving a Call. Check provider availability, account permissions, and usage limits. If execution is uncertain, inspect its status before retrying to avoid duplicate requests.
Authorization expires or repeated failures continue
When asked to sign in again, reconnect through the existing connector. OAuth can renew access while authorization remains valid, but revoked or expired authorization may require another sign-in. For support, provide the failure time in UTC, the error code, any displayed request ID, the Claude client used, and the failed step. Do not send passwords, API keys, cookies, tokens, authorization codes, HAR files, or callback URLs containing credentials.
Frequently asked questions
Do I need to edit a local JSON file?
No. This guide uses a remote MCP custom connector configured through Claude’s interface.
Do I need an Authorization header?
Not for this OAuth flow. Leave Request headers empty and complete authorization on QVeris.
Is Add the same as Connect?
No. Add saves the connector configuration. If Claude then shows a disconnected page, select Connect to complete authorization.
Does a check mark prove a successful data query?
It shows connection status. Confirm a real query by inspecting the tool execution and returned data.